What's new in The Falklands War: 1982
What's new in The Star and the Crescent
How to Create Advanced Map Effects
In this portion of the tutorial, we are actually going to share with you how we create the 'look' of an Armored Task Force game map. These techniques will help your create maps that are both visually appealing and more effective in communicating terrain the the player.
But beyond this, these techniques will also improve the performance of your map in Armored Task Force. Drawing terrain objects at runtime eats a lot of processor power. By using these techniques, you can eliminate the need for Armored Task Force to draw terrain objects to indicate their location on the map. This means better performance and less lag during game play.
You should not execute the techniques in this topic until you are sure you have added all of the terrain to the map that you want.
Change Terrain Types for Color Replacement:
We want to make the terrain appear as solid color blocks when the color map is displayed. We do this so that we can use color replacement to insert our own graphics on the color map. We will repeat these steps for every terrain type in the Terrain Type List.
|
1. Select 'Edit' from the 'Terrain Types' sub-menu of the 'map' menu. |
|
|
2. We are going to select every single terrain type in the Terrain Type List and change the way it is drawn. |
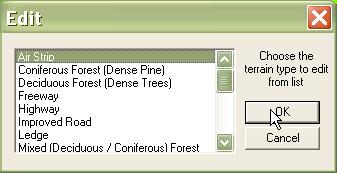 |
| 3. In each 'Terrain Type' dialog,
ensure that the 'Color' button and the 'Solid' button is selected, and
that the 'Outline Invisible' button is unchecked.
We also need to ensure that all of the terrain types have unique colors specified for their 'Color' representation (if you need to change a color, select 'Colors...'). |
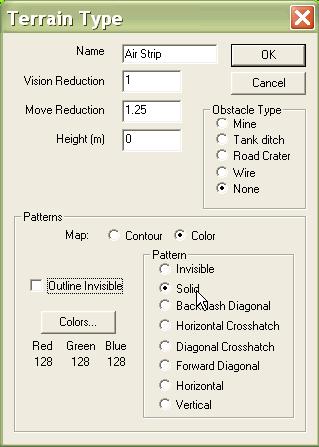 |
Build an Export Map Image:
The next step is to create an export map. A good export map indicates where terrain is on the map, so that you can replace it with your own, more attractive and descriptive graphics. Essentially, what we are doing is converting the map from DX format (see Creating a New Map), back into a normal Windows bitmap, but with all of our special terrain drawn on it.
| 1. We want to create an export map of just the color map, so we select 'Color' from the 'Map' sub-menu of the 'View' menu. | 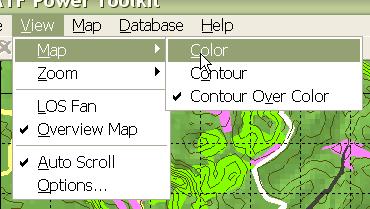 |
| 2. Second, we select 'Export Map' from the 'New' sub-menu of the 'Map' menu. | 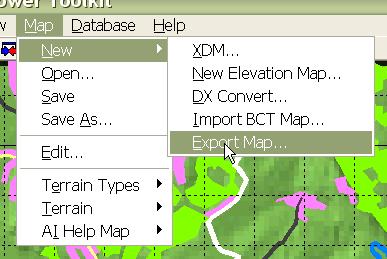 |
| 3. We are prompted to enter the name of the export map. It is best to save the map in the 'Data' sub-directory of the Armored Task Force install directory, since it will need to be there later, when we convert it back to DX format. | 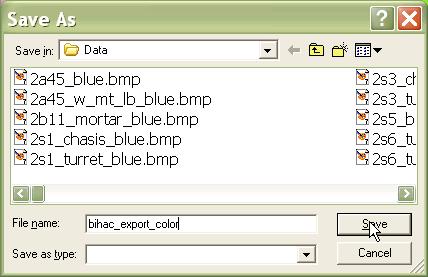 |
Edit the Export Map Image:
Prior to this step, we need to create graphics panels. These are bitmaps with graphics patterns representing trees, urban terrain, roads, and other terrain types. Each panel should be the same size as the export map for best results. We need one panel for each terrain type on the map. We assume this is completed before we continue.
We are just showing you how WE created maps for Armored Task Force. You can use any technique you want to modify or improve the style of the map.
| 1. Open 'Paint', the drawing program which ships with every version of Windows. After we have opened it, we are going to open our export map. |  |
| 2. After the export map is open, in Paint, we select 'Select All' from the 'Edit' menu... | 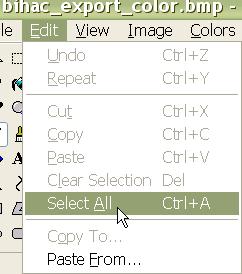 |
| 3. ... And then 'Copy', also from the 'Edit' menu. | 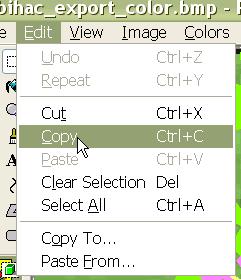 |
| 4. The whole export map is now stored in the clipboard. | 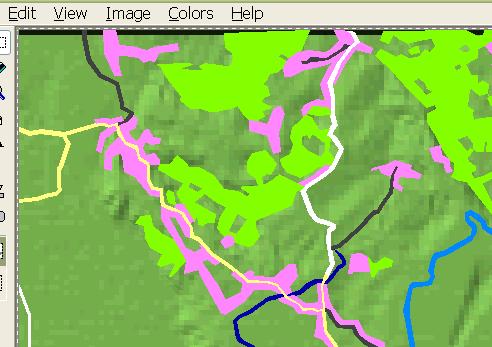 |
| 5. We need to select the color of the terrain we want to replace as a custom color in the colors menu at the bottom of the Paint window. First, we select the 'Select Color' tool from the toolbar and then we select the color of the terrain we wish to replace by left-clicking on it in the image. | 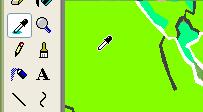 |
| 6. Select 'Edit Colors' from the 'Colors' menu. |  |
| 7. Select the 'Define Custom Color' button... | 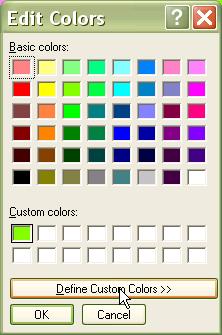 |
| 8. ...And then the 'Add to Custom Colors'. | 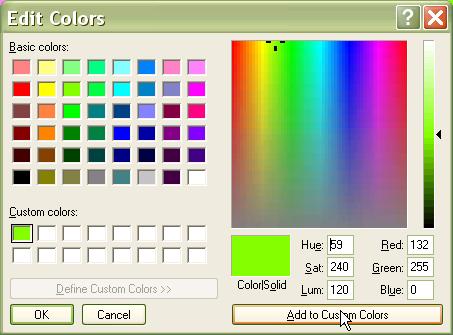 |
| 9. Next we are going to open the bitmap panel we built which corresponds to the terrain we want to draw on the map. We select 'Open' from the 'File' menu and select our terrain panel (which will represent the terrain type on our modified map). | 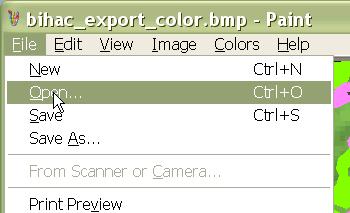 |
| 10. We select 'Edit Colors' from the 'Colors' menu again. |  |
| 11. We double-click on our defined custom color and select 'OK'. | 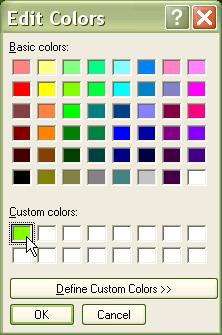 |
| 12. Now our custom color appears on the color bar. We are going to right-click on it so that it appears as the background color. | 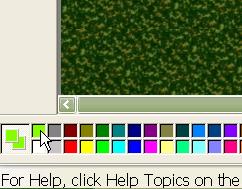 |
| 13. We want to cancel the 'Draw Opaque' function (so that the background color will not be drawn on pasted images) by selecting it in the 'Image' menu. | 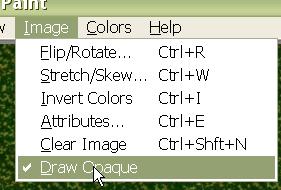 |
| 14. Now we are going to paste our export map (stored in the clipboard) over the panel. All of the places on the export map where the selected terrain is will be replaced with the graphics from our panel. | 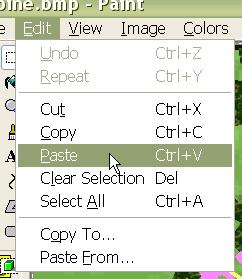 |
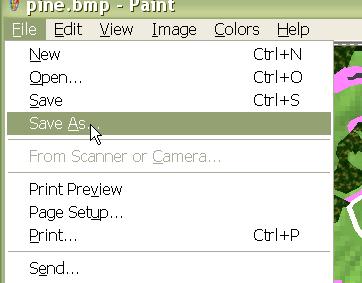
| 15. Now we save the resulting,
composite image over our old export map using 'Save As' from the
'File' menu (make sure you don't save over your panel by accident; you
may want to use it again for other maps).
We are going to repeat these steps for every terrain type which appears in the export map, until we have replaced all of the solid-colored blocks with more visually appealing terrain. |
 |
Import the Export Map Back into the Game Map:
We have finished modifying the export map, adding all of the graphics we want to appear on the finished map. Now we must make it usable by ATF (converting it to DX format).
| 1. Select 'DX Convert' from the 'New' sub-menu of the 'Map' menu. | 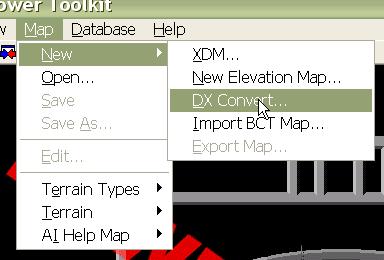 |
| 2. Select the export map. | 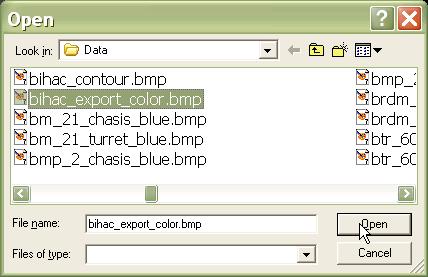 |
| 3. Select the old, DX-converted color map file. When ATF asks you if you want to overwrite this file, answer 'Yes'. | 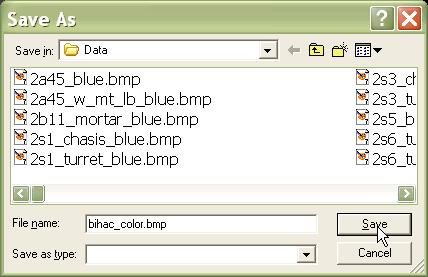 |
| 4. We can overwrite the 'bihac.map' file. Remember that all images of the exact same dimensions make exactly the same number and sized tiles (see Create a New Map). | 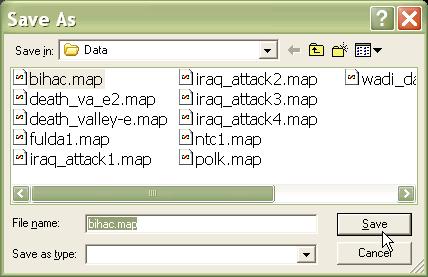 |
| 5. However, we cannot overwrite the game map (.gmp) file for this map. It contains pointers to all of the files in our game map and we will have to recreate it if we overwrite it. So, when prompted, just save our new game map with a temporary name and delete the file as soon as we are done. | 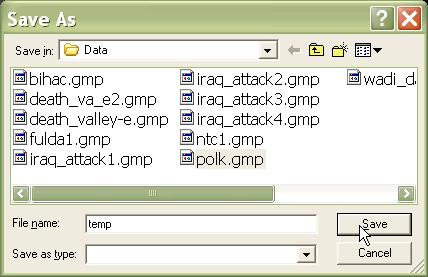 |
| 6. To see our map, we have to reopen the game map, so that the color map will be re-loaded into memory. Select 'Open' from the 'Map' menu. | 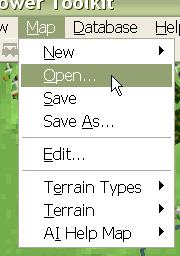 |
Make Terrain Objects Invisible:
Wait a minute! What happened? We have changed the map but it still looks the same? We have to tell Armored Task Force not to draw the terrain itself, so that our handiwork can shine through.
| 1. We are going to have to edit every terrain type again. To save ourselves work, we are going to get a head start on the next step, which is exporting our contour map with the terrain drawn on it. Select 'Edit Terrain Types' from the 'Map' menu. | 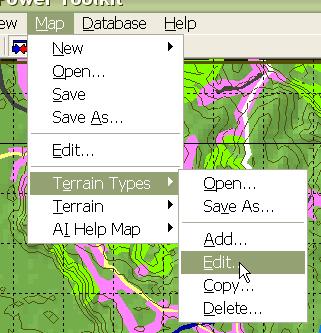 |
| 2. We are going to select each terrain type, from top to bottom. | 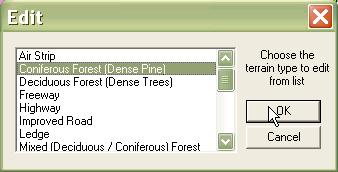 |
| 3. First we are going to select the 'Color' button, select 'Invisible' and 'Outline Invisible'. This will prevent Armored Task Force from drawing Terrain Objects of this type on the map. | 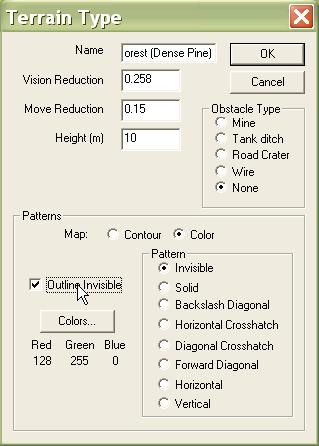 |
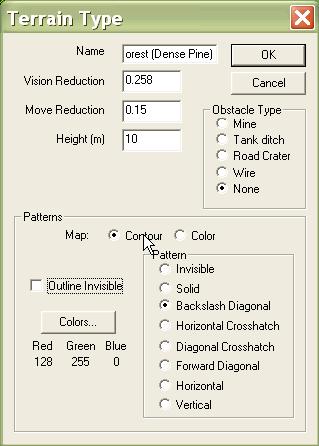
| 4. Then, we are going to select the 'Contour'
button and select the pattern and color which we want to use to
represent the Terrain Type on the contour map.
So that our graphics can show through the contour map when using the 'Contour Over Color' view, we recommend using line patters rather than 'Solid'. We also recommend using a different color for every terrain type, even if they have different patterns. It makes it easier to identify these terrain types at a glance. |
 |
Making Terrain Permanent on the Contour Map:
We are going to create an export map of the contour map as well and re-import it into Armored Task Force. But we are not going to edit or make any changes to the export map before we import it. Why do we do this? If you have a lot of graphics on the contour map, when it is shown over the color map (when the 'Contour Over Color' view is active), the added graphics will block out the color map. We want all of the terrain to be transparent, so that you can see the color map beneath (see previous step).
Why bother? If we are not going to change the contour map, why execute this step. it's simple. Drawing all that terrain on the map takes ATF a lot of processing power. That causes lag and slows down game play. If we make the drawings on the map permanent, and prevent ATF from drawing the graphics, we will speed up the game.
| 1. We want to export the Contour map, so we need to display the contour map. Select 'Contour' from the 'Map' sub-menu of the 'View' menu. | 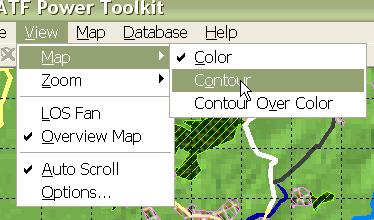 |
| 2. Now we select 'Export Map' from the 'New' sub-menu of the 'Map' menu. When prompted, we save the export map with a temporary file name. We can delete the file after we complete this topic. |  |
| 3. We select 'DX Convert' from the 'New' sub-menu of the 'Map' menu... | 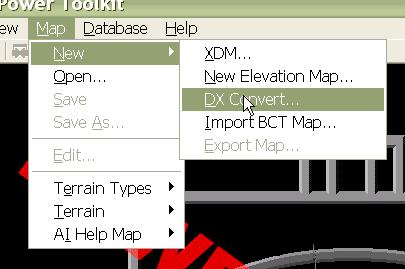 |
| 4. ...We select our export map... | 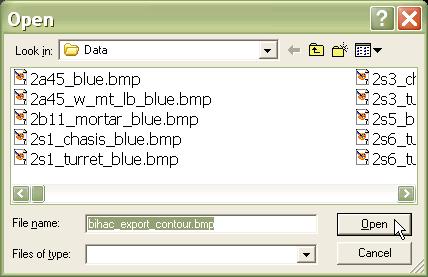 |
| 5. ...We choose to overwrite our old contour map and answer 'Yes' to overwrite prompts. | 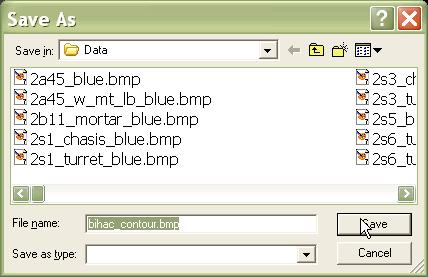 |
| 6. Again, it is safe to overwrite the original .map object... | 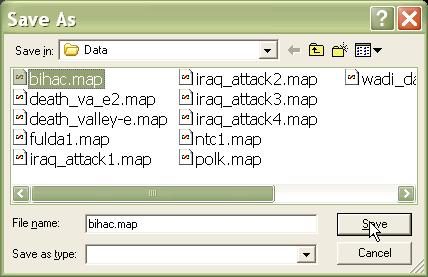 |
| 7. ... But not the game map object (.gmp). | 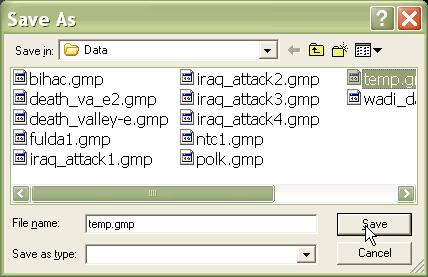 |
| 8. To see our map, we need to reopen it. Select 'Open' from the 'Map' file... | 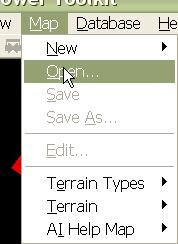 |
| 9. ... And the game map file for this map (.gmp). | 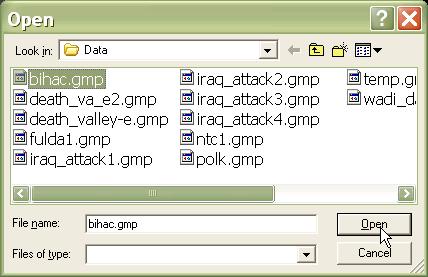 |
Make Terrain Objects Invisible, Part II:
Finally, we have to tell Armored Task Force not to draw the terrain when the contour map is shown, either.
| 1. Select 'Edit Terrain Type' from the 'Map' menu again. | 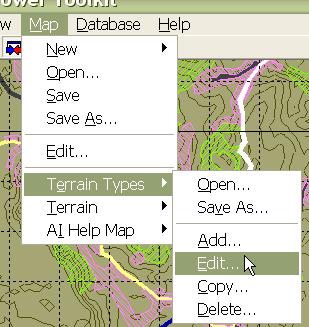 |
| 2. One last time, we are going to go through each terrain type. | 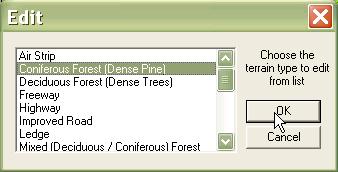 |
| 3. This time, we are going to, for each terrain type, select the 'Contour' button, and then 'Outline Invisible' and 'Invisible'. This will prevent Armored Task Force from drawing this terrain type on the map. | 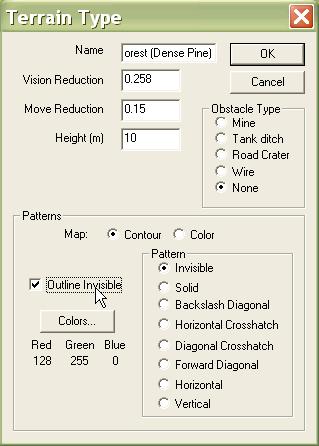 |