Breaching 101
© Michael K. Robel
When coming up against mines, breaching is very important. This short article provides some tactics, tips, and procedures for getting through those dastardly obstacles. First some background.
What are obstacles for?
Obstacles are used to slow or channel enemy movement usually in order to improve an engagement. They may force you to turn, stop, or even consider another avenue of approach. All things being equal, it is better to bypass a minefield instead of breaching it, however, sometimes the bypass is left open deliberately to spring a trap. Obstacles usually impose about a 30 minute delay on an attacking force, although it can be much longer. At the NTC, task forces are known to flounder in a breach for three or four hours, usually being destroyed in the process.
Once more into the breach, dear friends.
The first step in breaching the minefield is finding it. In the real world, you can usually see an anti-tank ditch, by the spoil and the fact that there is a hole in the ground, unless it is carefully sighted. Not so in most simulations when the first time you see it is when you run into it. (Different games portray these obstacles differently.)
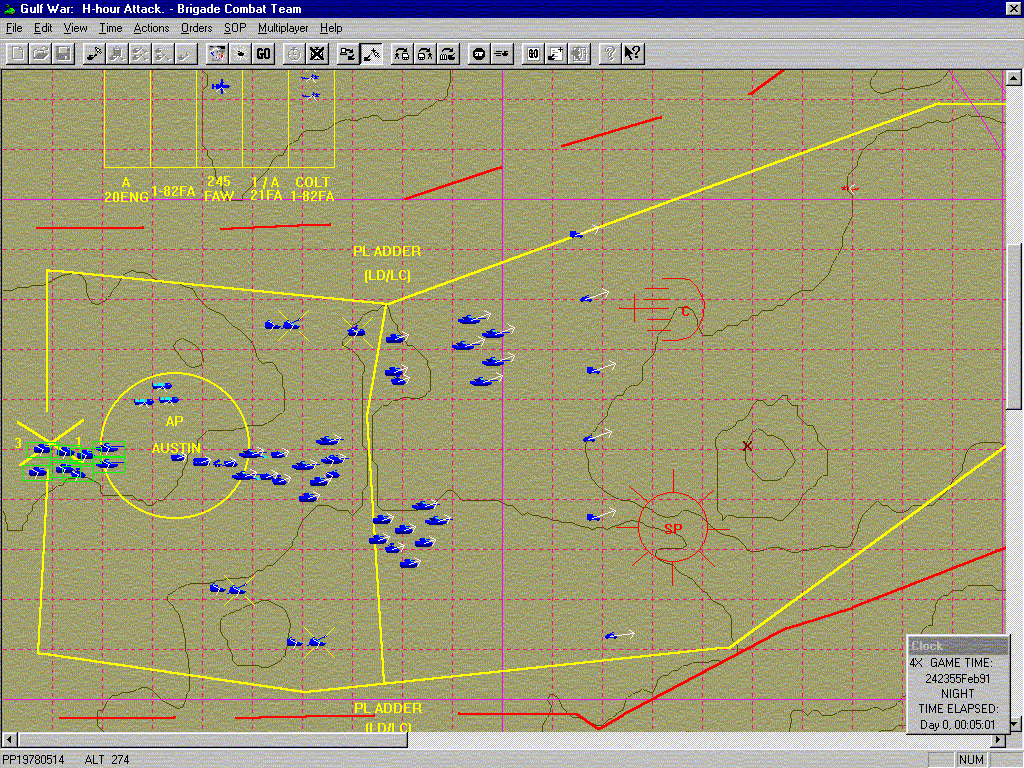
Figure 1 Moving Out
In Figure 1, the Task Force is moving out from the line of departure with the scouts leading. Their job is to discover any enemy in front of the TF and find the minefields and AT ditches before my tank and mech teams find them. The scouts are right now about 2 kilometers in front of the lead units of the TF and have already used artillery to destroy one enemy outpost and have discovered another.
In Figure 2, the scout team in the far south has discovered Anti-Tank Ditches. Accordingly, I have decided to make my breach in the south. Since Anti-tank ditches are the first obstacle my scouts discovered, I will make the initial breach with ACES. Ideally, one should smoke the breach site with artillery and mortar smoke as well as destroy any enemy forces having the ability to control the breach site with direct fire before committing the ACES. Engineer vehicles (ACE, Mine Plow tanks, MICLIC, and AVLB) are the first priority for the defender to destroy. As you can see, I am still using my artillery to clear my zone of the enemy forward forces to prevent them from calling artillery on me. (You can also see I am nearly outrunning my artillery range.)
Figure 2 Discovering the Breach
There are four steps in making a breach. The first is securing the near side followed by suppressing the far side. In this case, there is little enemy force in the region of the breach, so the operation is fairly simple. The majority of the enemy was in the battle position in the far north of sector, which was destroyed with an MLRS volley and some 155 missions. Making the breach, I have moved the assault force through to secure the far side.
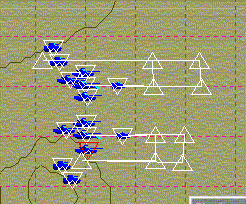
When making a breach, I usually use two ACE’s first (Figure 3). They go through about 1,000 meters apart and cut two breaches. I then turn them left and right, move them about 500 meters, and then have them cut two new breaches. This way you get four breaches in a short period of time and get the ACES out of the danger zone.

Figure 3 Making the Breach
Using the same procedure, I usually have two plow tanks follow the ACES through. This provides them some protection and also allows you to breach a minefield if it is right behind the AT Ditch. The mine plows use the same procedure. It helps to make sure that the breaches are exactly in line with each other to simplify moving your other forces through it. Copy each ACE movement order and use in-line paste on the Plow following it. Extend the movement points as shown in Figure 3. The tanks move faster than the ACEs so either wait till the first breaches are cut or use march speed to maintain the spacing between them. Unsticking the Plow in the midst of all the other information on the screen is time consuming and difficult.
(Note to Defenders: Don’t always construct your obstacle the same way. Sometimes put the AT Ditch in Front, sometimes the minefield. If you are really dastardly, put them as close together as you can.)
The Assault force should move forward about 1,000 meters from the breach and this should allow them to clear the region of enemy forces with fire to a range of about 4,000 meters, depending on terrain.
In Figure 4, the breach is underway; the steel rain of the MLRS Platoon has generally suppressed the far side. The next step is to seize the far side
Figure 4 Through the Breach
After the assault force is through, start moving other forces through as fast as possible. If the enemy is any good, he has taken advantage of the delay he has imposed upon you to move other forces into range or launch a pre planned counterattack against the breach.
The next figure shows a close up of my forces beginning to move through the breach. If you are bifocally challenged, you must use this view to get through, because the tolerance for getting into your gap and getting stuck is not very much. And it takes a long time to unstick a company from a ditch or minefield.
Figure 5 Up Close and Pesonnel
In the Figure 6, you can see I have had to start over. I have discovered what looks to be the enemy’s main defensive belt. I have again elected to breach in the south, so I am concentrating my combat power there to start clearing the breach zone of enemy forces using direct and indirect (artillery) fire as you can see by the "X’s" in front of my units. In this case, I shall press forward slowly till I find the obstacle with my main units.
I am bringing the engineer units up and getting them ready for the breach. Again, this would be done with two ACEs followed by two Plow Tanks. My other forces are closing up and being configured into the Assault force and the exploitation force.
Another important thing is not outrunning your artillery support, so make sure you bring them up far enough to support your operations. They should be no more than one-third of their range off the forward line of troops (FLOT). You can see two batteries clustered near the breach in Figure 6 and they will follow the trail team through the breach.
Figure 6 Starting Over
The Use Of Specialized Equipment
There are of course specialized pieces of equipment in BCT other than ACEs and Plow tanks. They are the AVLB and the MICLIC.
The AVLB can quickly breach a minefield by laying a bridge over it. The normal BCT icon is good for about 4 such breaches. The MICLIC flings a charge across a minefield and blows a gap in it by detonating all the mines underneath the charge. The engineer platoon is good for about three of those breaches.
Use the same kind of formation for the AVLB/MICLIC combination as you do for the ACE/Plow. They automatically breach any obstacle in front of them, so just watch their status closely, then start feeding forces through.
These pieces of equipment make a larger breach than the ACE and Plow do, but they are more vulnerable. I usually save them for the final assault on the objective and use them to widen the existing gap behind the assault force so I can more easily move the follow on forces through. In Figure 7, you can see I have rushed the whole TF through the breach in order to overwhelm the enemy on the objective.
Figure 7 The Final Assault
This page is Copyright Mike Robel, 1999. All other contents of this web site and BCT: Brigade Combat Team are the copyright ©1998 of ProSIM Co. Windows and Windows 95 are the registered trademarks of the Microsoft Corporation. Any pictures not bearing the ProSIM or BCT logo, or any graphic resources thereof, are believed to be public domain and freely distributable. Please address questions or comments concerning this site to webmaster@prosimco.com.